
Projects
Plan a goal, connect issues, and keep a record of progress.
A project gathers issues around a goal. Use Create a project for the composer, then return here for the overview, resources, milestones, updates, and lifecycle.
Create a project
Select the plus button beside Projects in the sidebar, or open the Projects page and select New project. Enter a name and a two-to-eight-letter identifier. Issues assigned to the project use that identifier as their prefix.
Add a short summary for the project list and overview. Put the longer brief in the description. You can set status, priority, start date, target date, and milestones in the dialog, or add them after you save. Select the icon above the name to change its symbol and color.
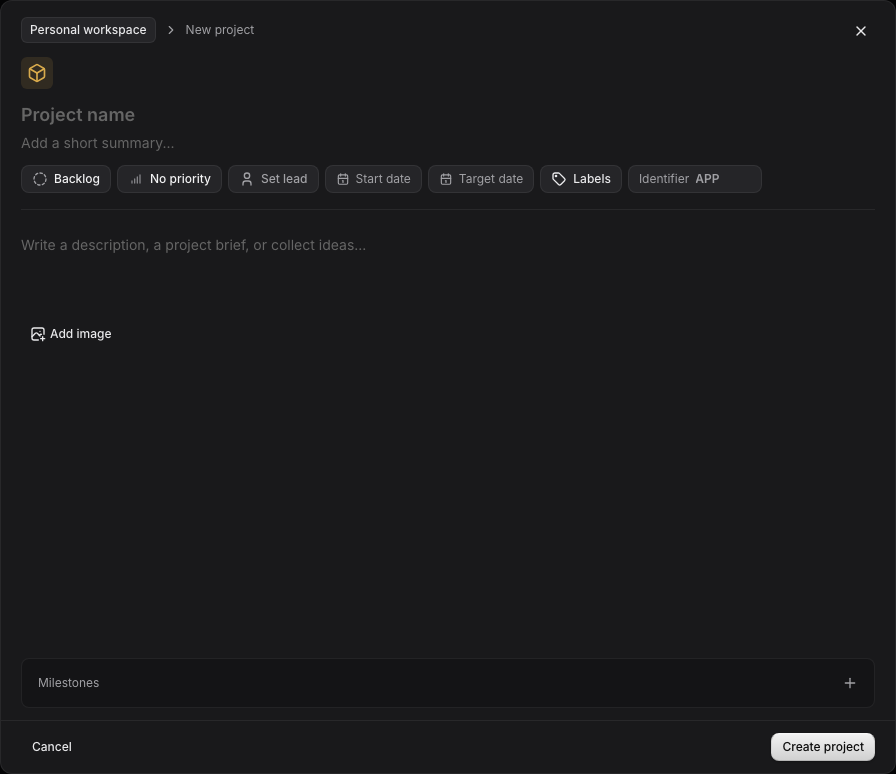
If you know the first stage of work, add a milestone before creation. You do not need an issue list before you create the project.
Find a project
Open Workspace → Projects. The table shows the name, priority, lead, target date, issue count, and status. Use Find projects to narrow by name. Use the status and priority controls to filter. The sort control offers updated date, name, status, target date, and priority. Select a row to open its overview.
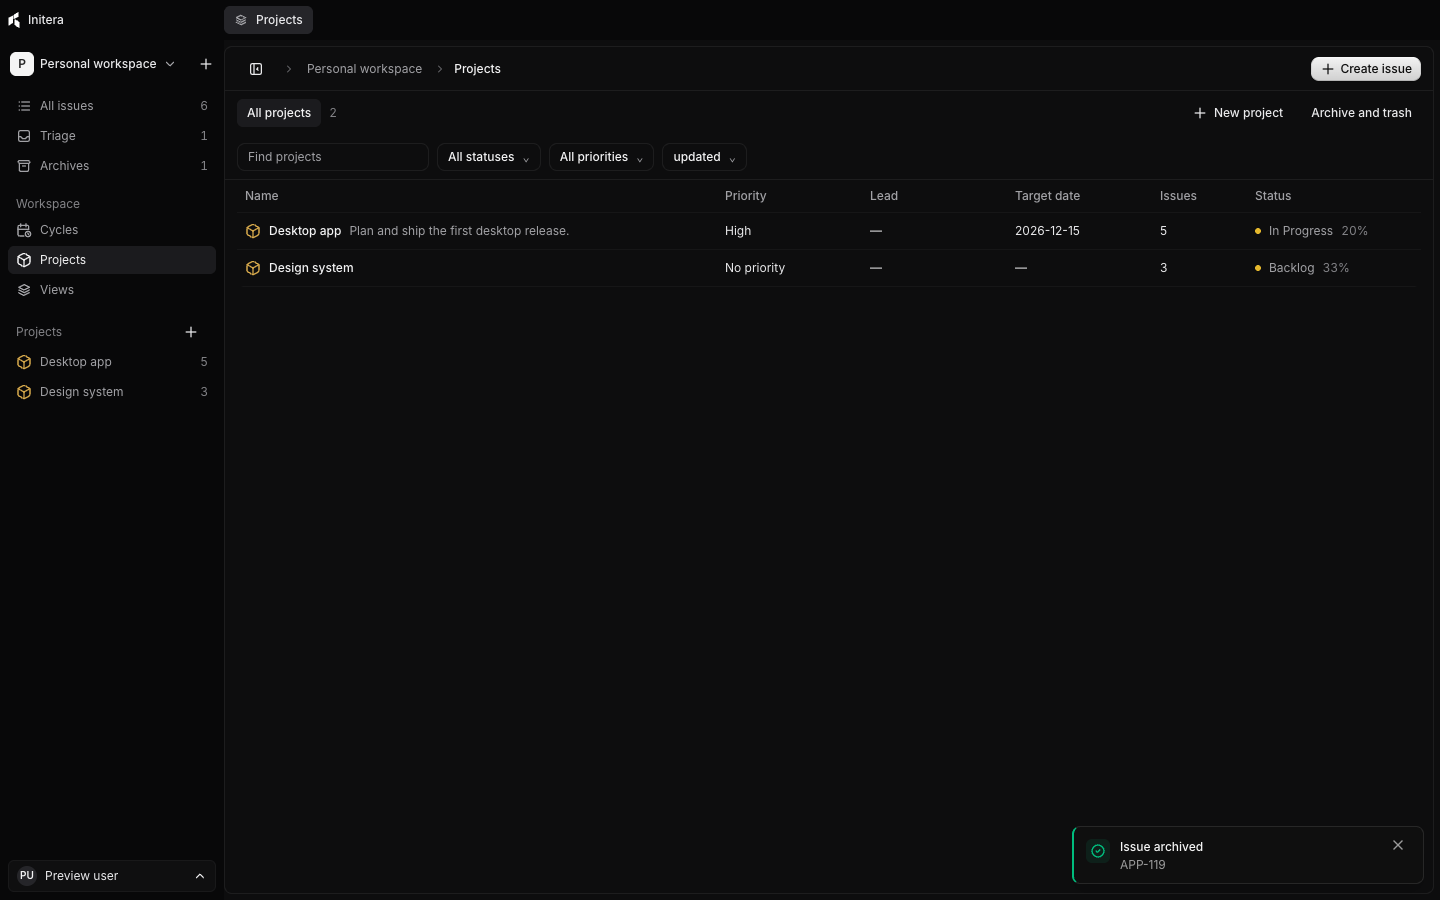
The project sidebar gives you a direct link to each active project. The issue count beside a name follows the issues assigned to that project.
Change properties from the overview
Select the project icon to change its color or symbol. Select the name or summary to edit that text. The right panel holds status, priority, start and target dates, lead, and labels. Select a value there to change it; you do not need to enter a separate edit mode for those properties.
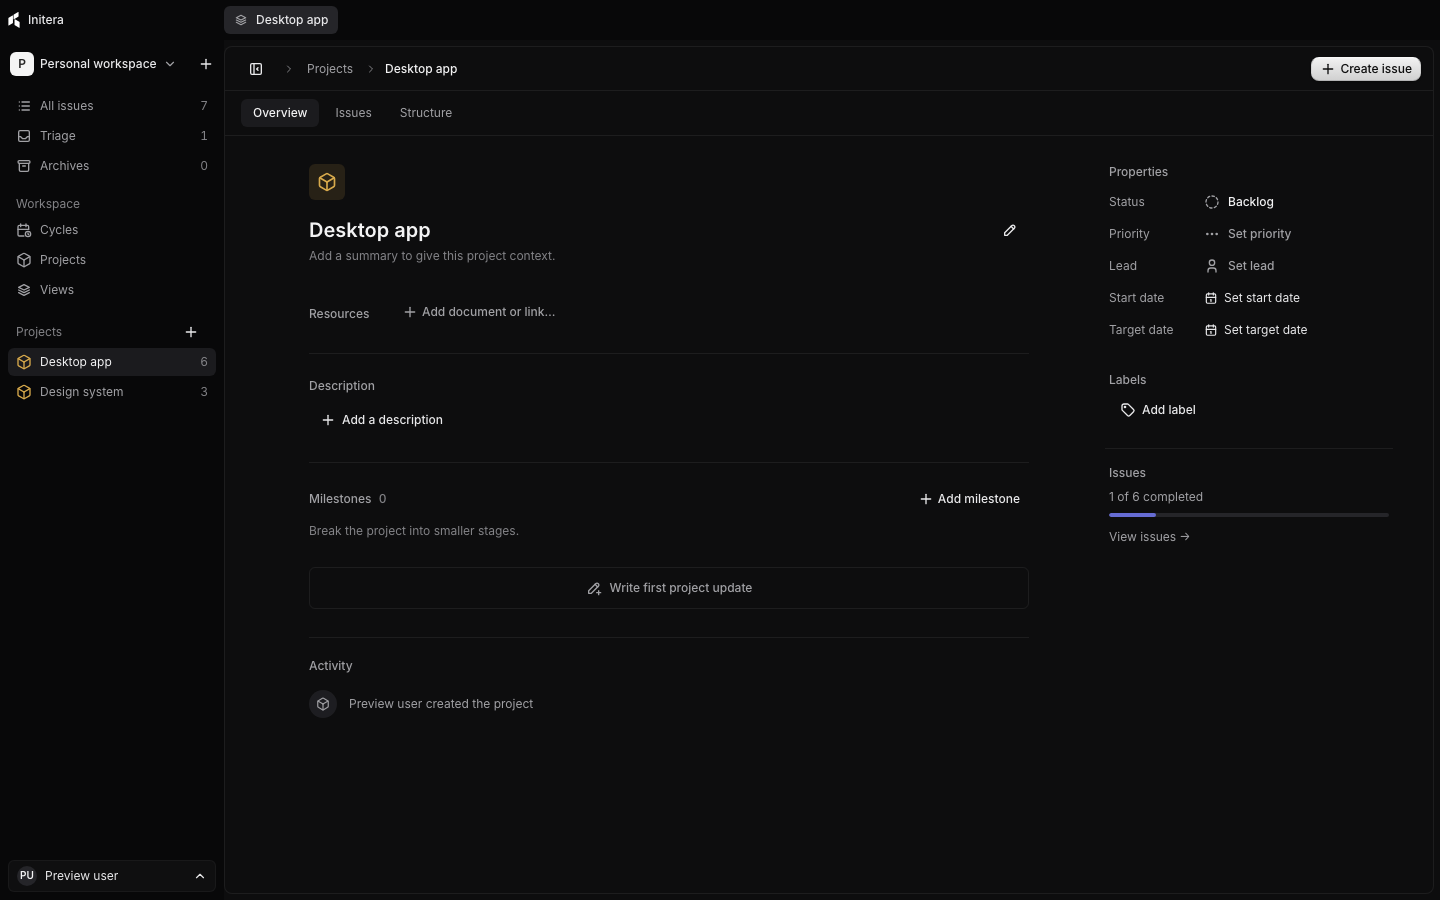
The Issues tab shows issues assigned to the project. An issue's project property controls its membership. If you move an issue into or out of the project, the overview count and progress follow the assignment.
Add a resource
Use Resources → Add document or link… for a URL the project needs, such as a specification or design file. Enter a title and URL. Use the controls beside a resource to edit, remove, or reorder it. Put instructions about one issue in that issue's description instead.
A resource link does not upload the linked file. If a link points to a file outside Initera, keep access to that file when you share or restore the project.
Plan milestones
Select Add milestone under the project description. Give the milestone a title, optional description, and target date. Assign an issue to a milestone from the issue's properties. You can reorder milestones as the plan changes.
Removing a milestone detaches its issues without deleting them. The project keeps a restore option for removed milestones. Check the issue count after you restore one, since issue assignments may need review.
Group work into modules and features
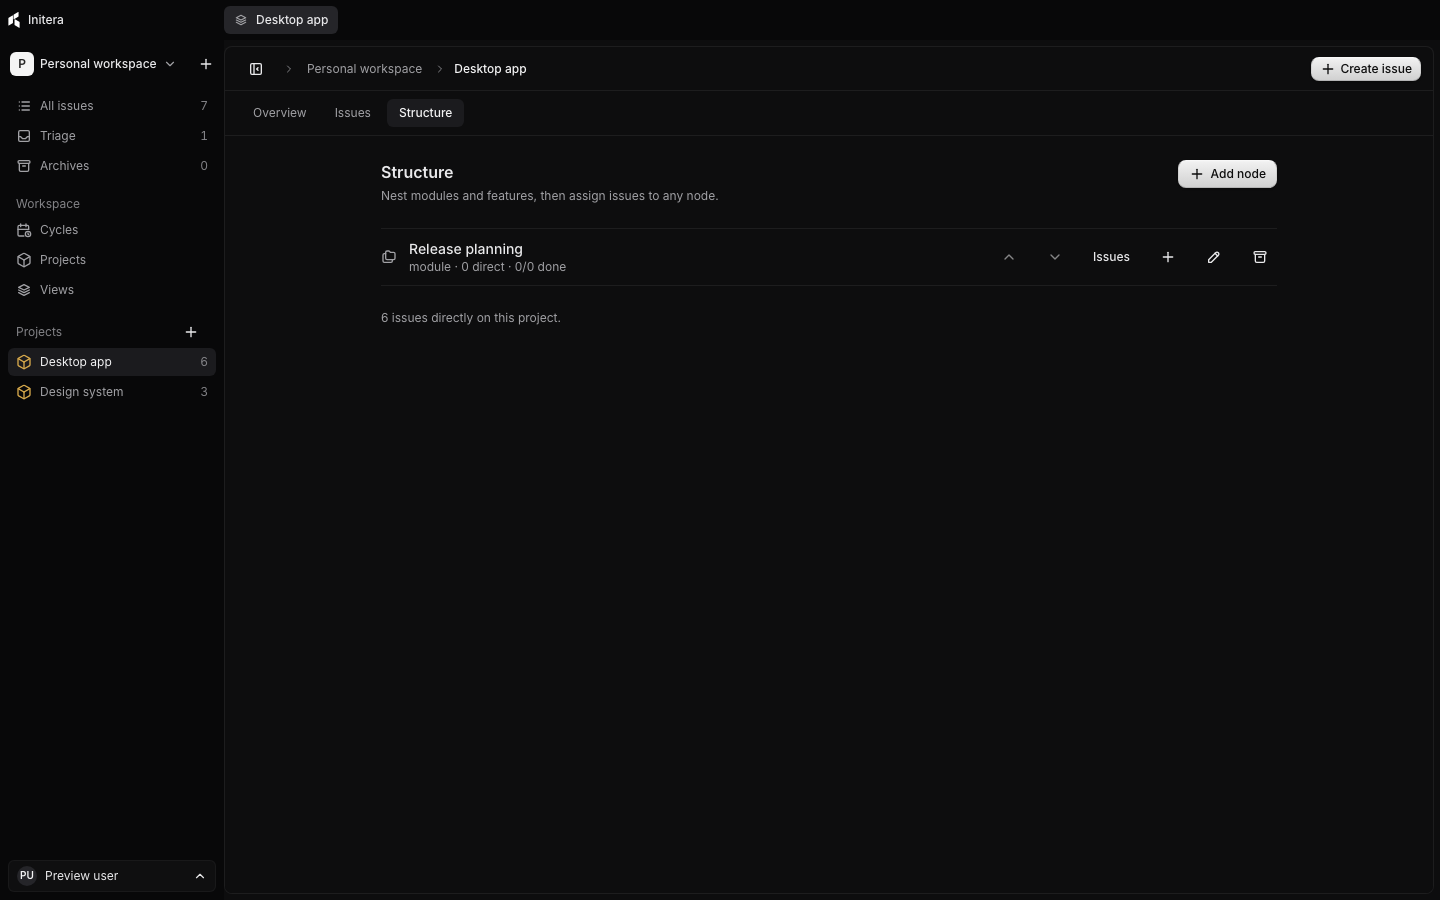
Open the Structure tab when a project needs more than a milestone list. Create a Module or Feature, place it under a parent if needed, and assign project issues to the node. The node shows direct issue count and completed work. Read Project structure for reordering, archive, dissolve, and restore.
Post an update
Below Milestones, select Write first project update or the update control. Write what changed, what needs attention, and the next decision. Save the update to put it in the project's activity timeline with your name and date. The timeline also records project property changes.
Use an update for a progress report. Use an issue comment when the discussion belongs to a specific task.
Archive or trash a project
Open the Projects page and select Archive to remove a project from the active list while keeping its issues linked. Select Move to trash to remove the project, its issues, structure nodes, and milestones from active work. The confirmation shows affected counts, running timers, and cycle dependencies.
Resolve cycle scopes and memberships before either action. Pause running timers before archiving. If you trash a project, the app stops its running timers and records which linked items this trash action removed.
Open Archive and trash on the Projects page to restore a project. Restoring a trashed project returns the items removed by that project action; it does not revive items you had removed before trashing it. Review the restored issue list after the app finishes.